# Publishing Your Website Online
Bootstrap Studio Sites (opens new window) is our powerful hosting platform for publishing sites online. It is super fast, gives you HTTPS, password protection, the ability to host custom domains, and best of all, it's free for all users of the app!
Publishing your design is very easy - just create and configure a new site, and hit the Publish button in the app. In this article we will guide you through the process.
Note
Bootstrap Studio Sites is not the only way to upload your sites online. You can simply export your design as a static website and upload it to a standard web hosting account via FTP. However our platform is much more convenient and we invite you to give it a try.
# Creating a Website
The first step is to create a free website on our platform. You do this from the Cloud > Manage Websites menu in Bootstrap Studio. This will open the Manage Websites dialog.
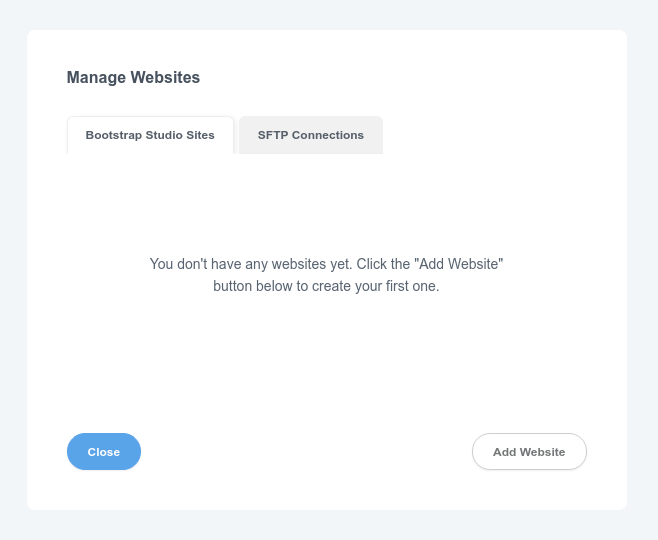
We don't have any websites configured, so we press the Add Website button. This opens up the Create Website dialog.
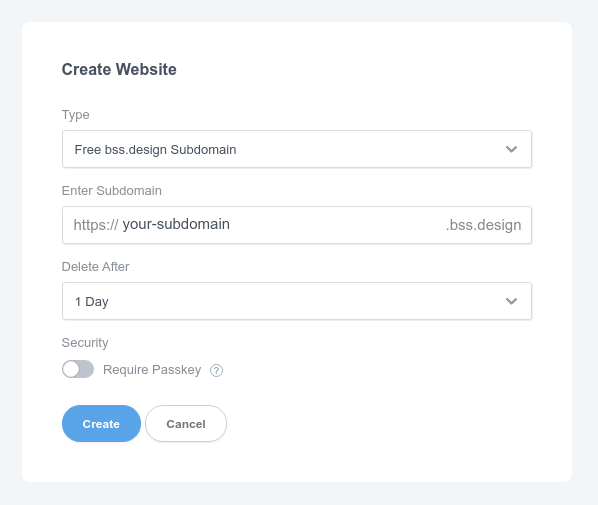
You have two types of domain names to choose from:
- A xxx.bss.design subdomain. This is straightforward and is the option we are going with for this tutorial.
- A custom domain name. This way you can point your own
example.comdomain name to our hosting service. This is a bit more involved, and we've covered it in our custom domain tutorial.
As you can see in the image above, you have a few other options to choose from:
- Subdomain. The xxx.bss.design subdomain you wish your site to show under.
- Auto deletion. This is an optional setting that you can enable. With it you can set a site to be deleted automatically, if for example you wish to create a temporary site to show off your design to a client, but you don't want it to stick around for long. You can set this to never.
- Passkey protection. If you wish to limit your website so that it can only be viewed after a passkey is entered. Learn more about this option in our password protection tutorial. You can change the key or enable/disable the option later, by editing your site.
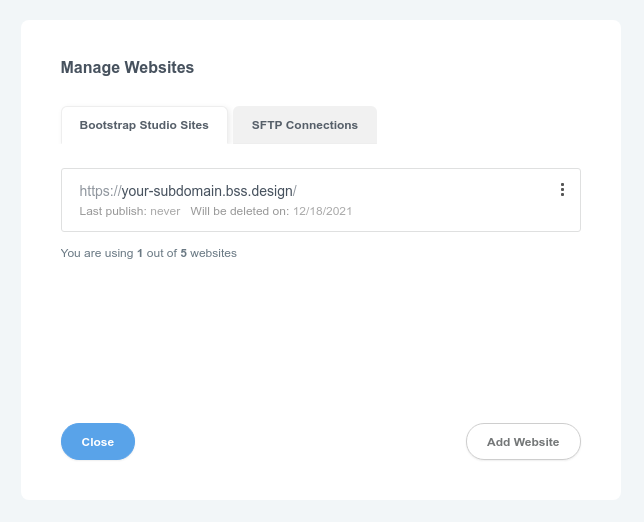
To create your site, just hit the Create button and it will show up in your list of sites. You can edit and delete the site from a menu that is triggered by clicking the 3 dots on the right. Deleting the site will free up a slot for a new one.
# Publishing a Website
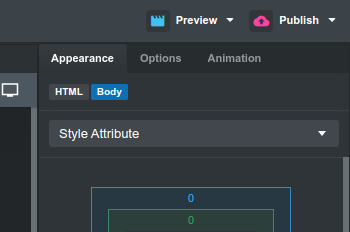
After you've followed the above steps, you now have a fully working website that you can publish to. Publishing itself is straightforward. Just open the design you wish to publish online, and hit the Publish button on the top-right.
If this is the first time you publish your design, the app will prompt you to choose a website you wish to publish to.
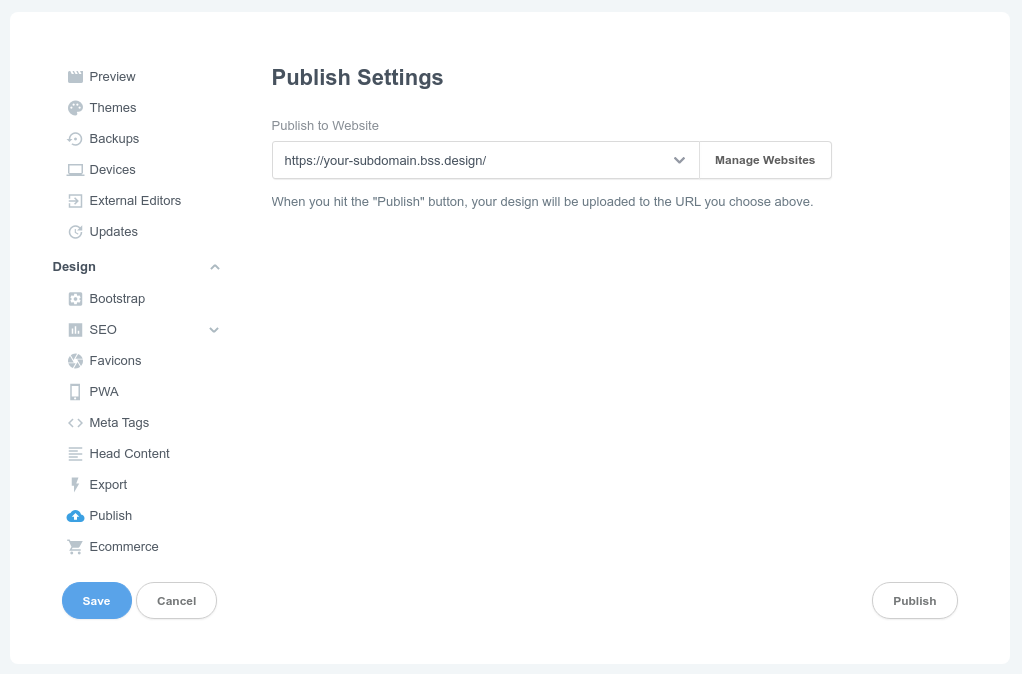
Just select the site you wish to publish to and hit the Publish button. The app uses an efficient data transfer protocol and uploads only the changes you've made since your last publish. This makes the process lightning fast.
And just like that, your site is online and hosted on our powerful hosting platform.
# Publishing via SFTP
If you wish to publish your website to another hosting provider, you can make use of Bootstrap Studio's ability to publish via SFTP. To do this, you first need to set up an SFTP connection.
From the Manage Websites dialog (access it from the Cloud > Manage Websites menu in Bootstrap Studio), select the SFTP Connections tab.
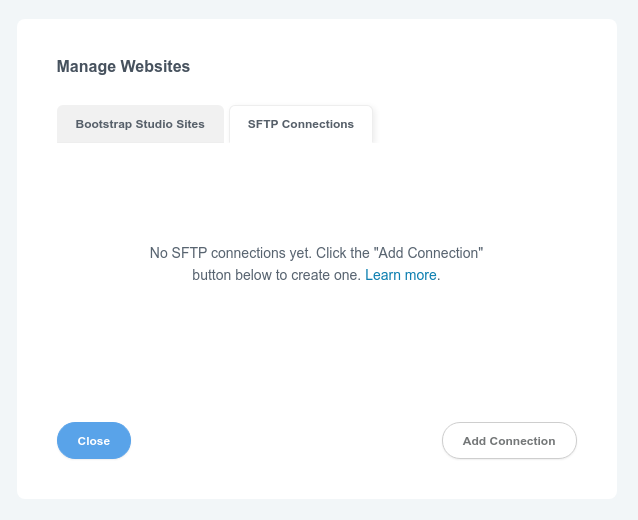
Then press the Add Connection button. This will open the Create Connection dialog.
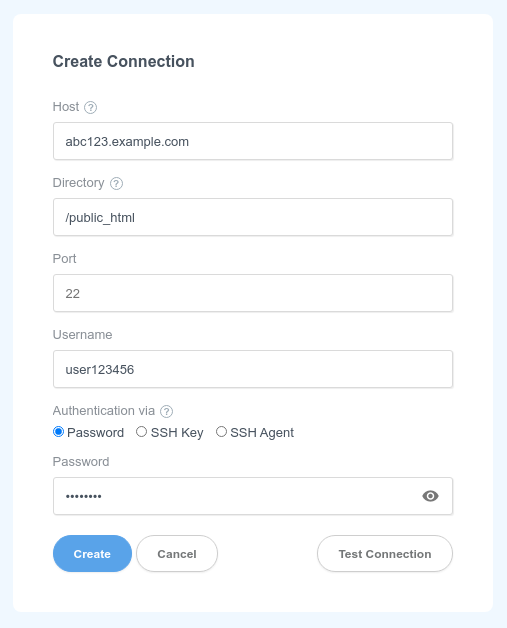
Here you will need to enter the following:
- Host - this is the ip address or the domain/subdomain of your SFTP server.
- Directory - this is the directory path where the files will be written to after Bootstrap Studio connects to your server. It may be the root directory
/, or something resemblingpublic_htmlorwww. Consult with your hosting provider's documentation or connect through FileZilla and copy the directory path. - Port - The port on which the SSH service is running on. By default it is 22.
- Username - Your SFTP or SSH username.
- Authentication - Three types of auth are supported: _ Password - Just enter the password that your hosting provider has generated for you. _ SSH Key - This is a more secure authentication method. It involves generating a public/private key pair and provisioning it on the server. Here you can select the private key file to use. If your key has a passphrase you can enter it here. * SSH Agent - This is the most secure and recommended method. If you have an SSH Agent application running on your computer, Bootstrap Studio will connect to it for authentication. This way the app doesn't need access to your SSH keys or your passphrase. If you are on macOS or Linux you already have an SSH agent running and only need to add your SSH key to it. If you are on Windows you will need to run Pageant, which comes with the Putty SSH client.
After you fill in your details, you can click the Test Connection button and Bootstrap Studio will attempt to login to your SFTP server.
Notes
- Bootstrap Studio supports only SFTP connections. The legacy FTP protocol is not supported.
- SFTP passwords and passkeys for private keys are stored only in your local Bootstrap Studio copy. They are not uploaded to our servers. This means that you will need to enter these settings again when reinstalling the app or setting up a new computer.
- Since the SFTP protocol runs on top of SSH, you can set up SFTP publishing to any server you have SSH access to (unless your admin has disabled SFTP for your SSH account; try connecting through FileZilla to see if your server does indeed support SFTP).
- Bootstrap Studio only supports private keys in the OpenSSH format. Keys generated in the Putty format will not work and will need to be converted.
Once the connection is saved, you can select it from the dropdown when publishing your design.
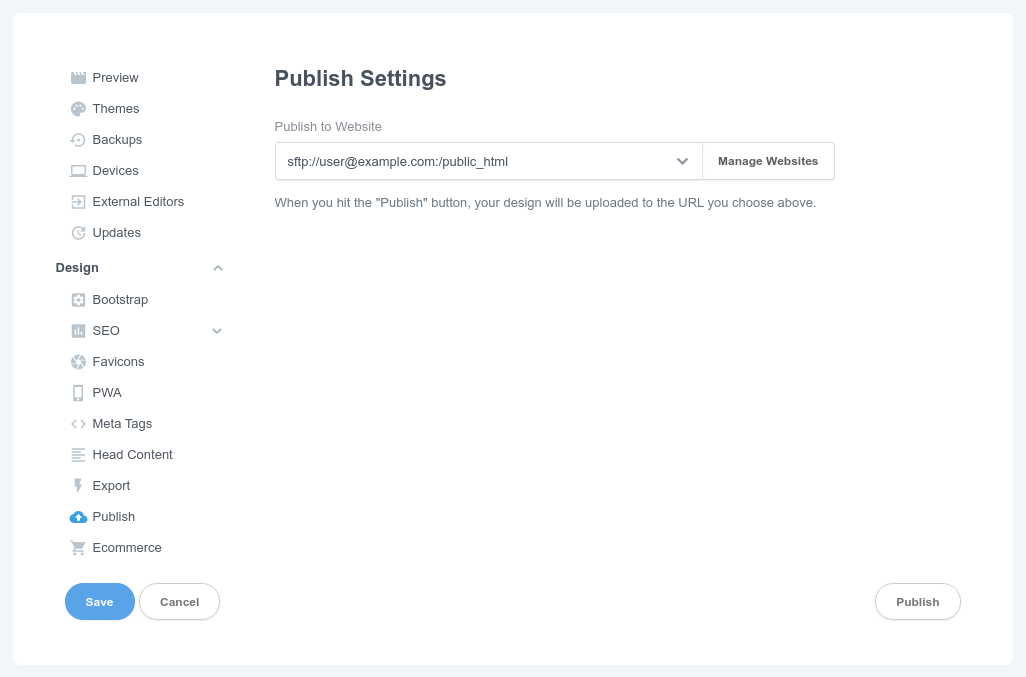
And with this you can now publish to any SFTP server and have your website online with a single click!
# Advanced Publishing
Bootstrap Studio supports three modes of publishing your design to your selected provider.
# Full Publish
This is the standard action which occurs when you press the publish button. Your design is converted into a static website consisting of HTML, CSS, JS files, images and fonts, and the entire bundle is uploaded to either our hosting platform or your chosen SFTP server.
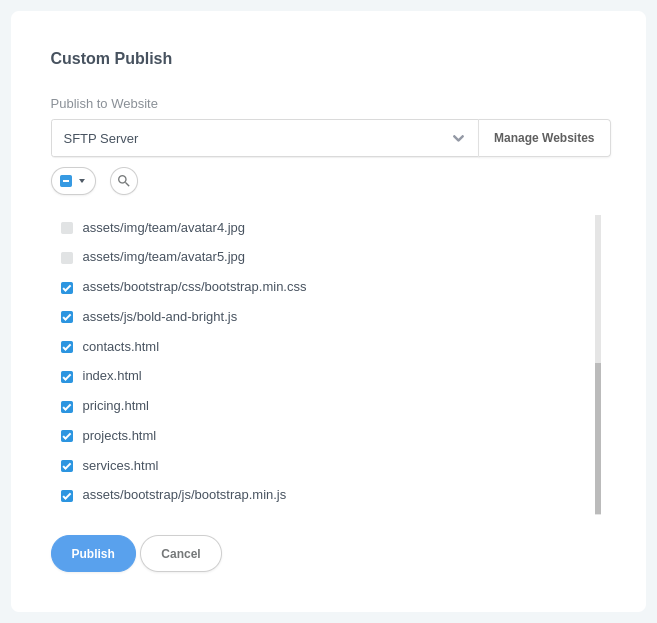
# Custom Publish
Custom publish builds upon the full publish mode. However instead of uploading the resulting static website, It presents the files in a dialog for individual selection so you have control over which file is uploaded.
To trigger it, choose "Custom Publish" in the File menu or by clicking the little arrow next to the Publish button.
# Publish Changes
This mode takes the result of full publish, and compares it to the bundle produced from the previous publish event. Only the files that are different are uploaded, making the process more efficient. Note that the first time you use "Publish Changes" in a fresh session, it will behave like "Full Publish" since there is no previous publish even to compare to.
To trigger it, choose "Publish Changes" in the File menu or by clicking the little arrow next to the Publish button.