# Tags and Authors
Bootstrap Studio's built-in blog functionality supports associating blog posts with tags and authors, and creating dedicated tag and author pages that will display relevant blog posts. In this guide, we will show you how you can use them.
# Blog Tags
Using tags in your blog posts involves the following steps:
- Create the tags in the
Settings > Blogdialog. They are saved on the design level, meaning that tags are available to all pages/blog posts in your design. - Assign the tags to a blog post from
Page Properties > Blog Options. - Display tags on your site.
- The Blog Tag Nav component displays a navbar with all tags in your design. Useful when building tag pages.
- The Blog Post Tags component is placed inside a blog post and displays only its assigned tags.
- Build a tag page (optional). If you wish to have a single page that collects all tags in your site, with dynamic filtering of posts by tag on click.
You can learn more about each of these steps below.
# Creating Tags
Creating tags is done from the Settings > Blog dialog, and then selecting the Tags pane.
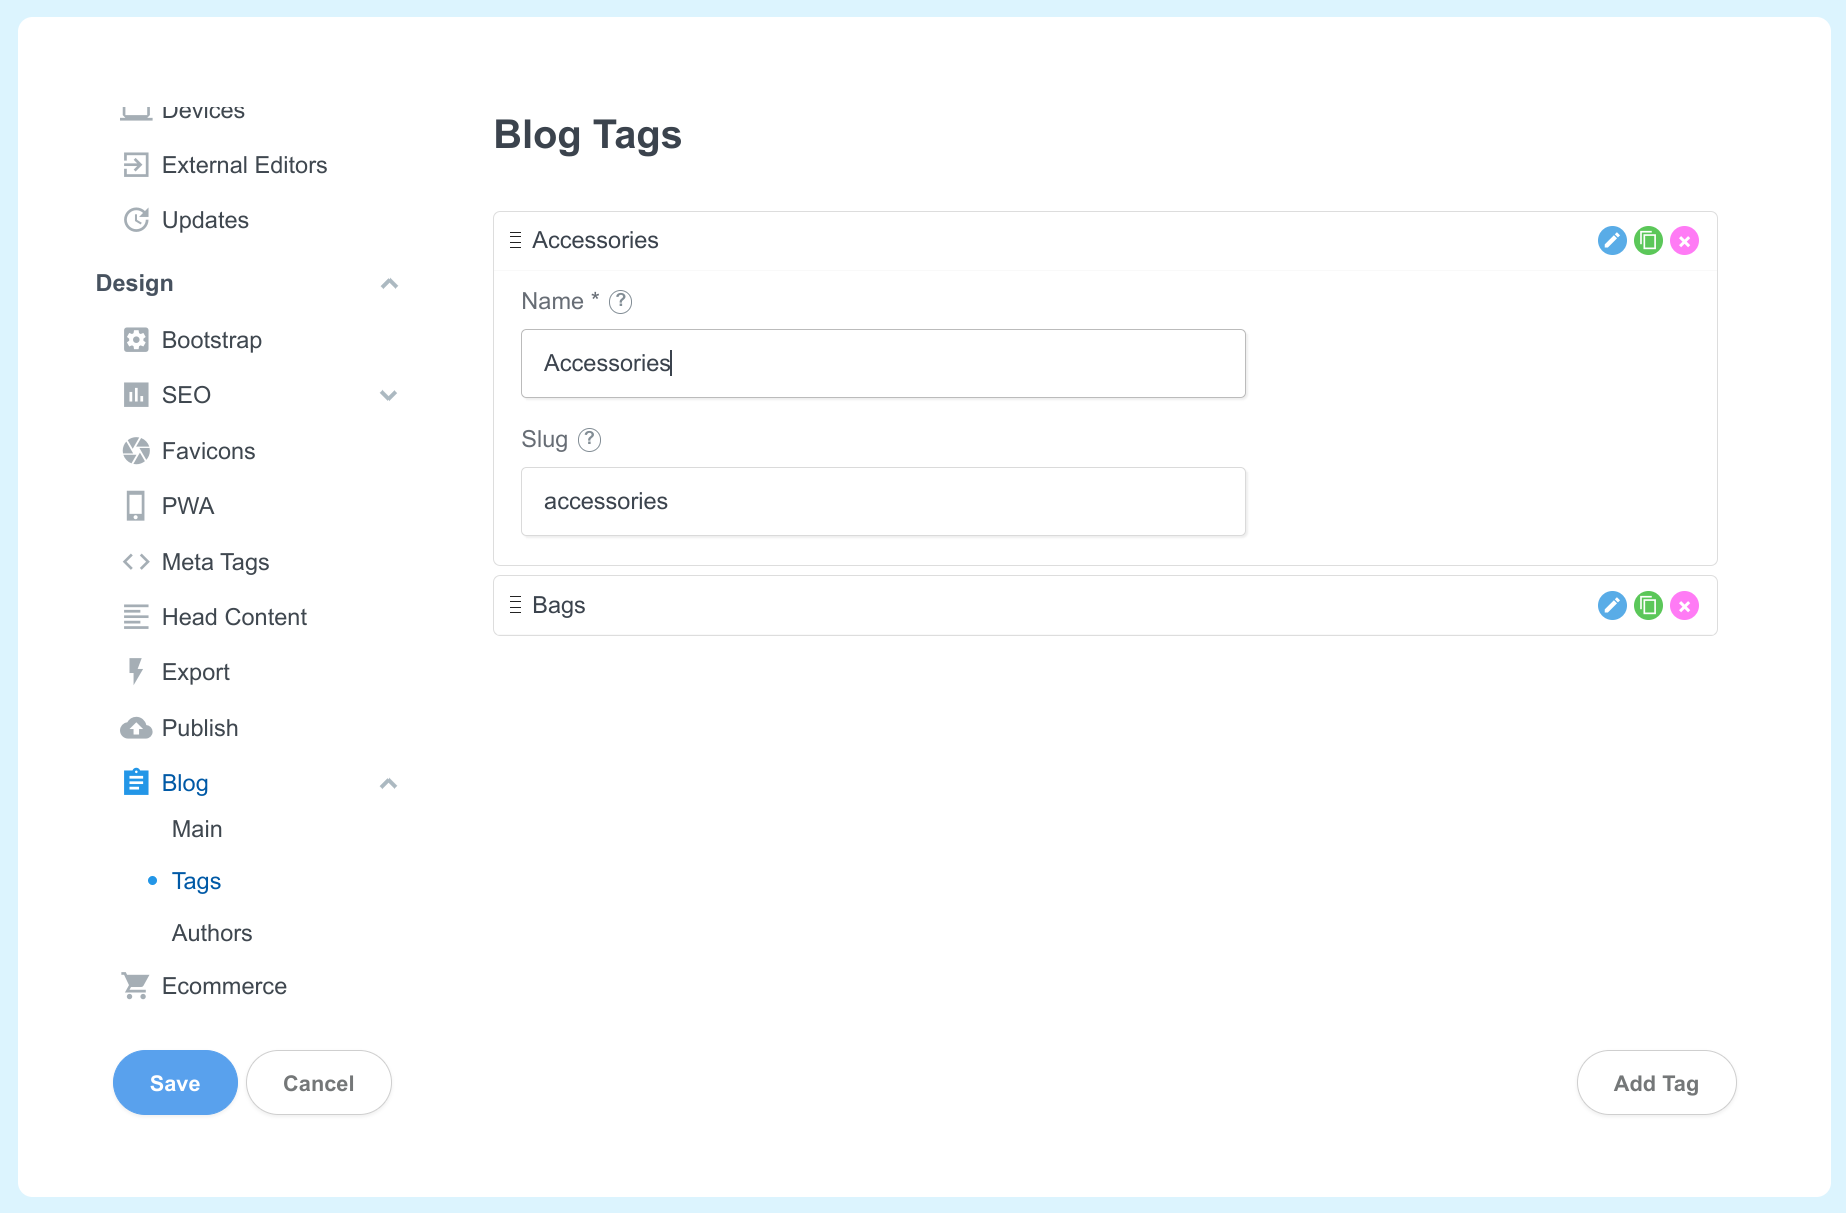
Here you will need to enter the name and slug of each tag. The slug warrants some extra explanation. This is a special identifier that is used when you set your tags to be links (more on this later). Each tag will add a ?tag=<slug> parameter to the URL when clicked. This enables your tag page to filter the posts in the loop by the tag.
You can rearrange the position of the tags by dragging the handle. This will affect the order in which the tags are displayed in the Blog Tag Nav and Blog Post Tags components.
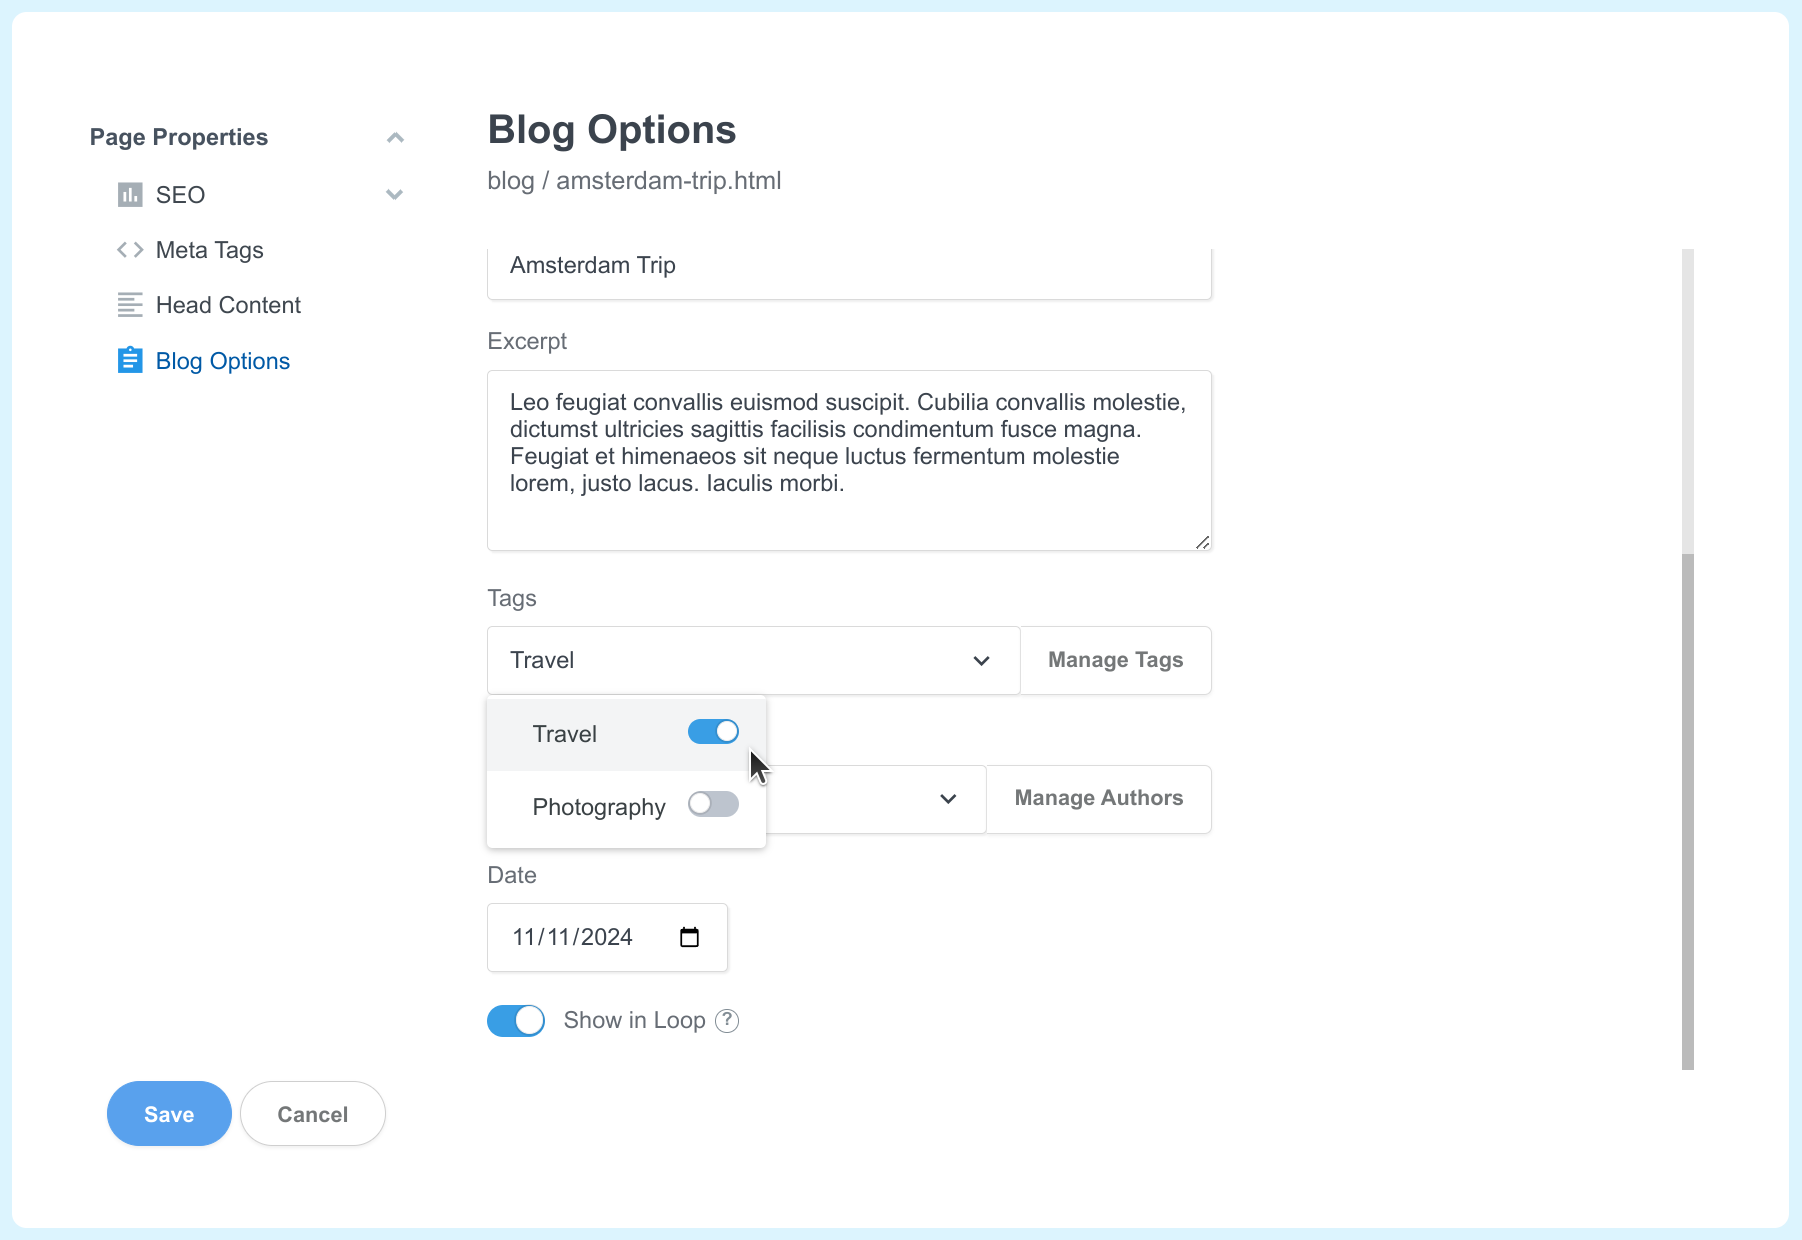
# Assigning Tags to Posts
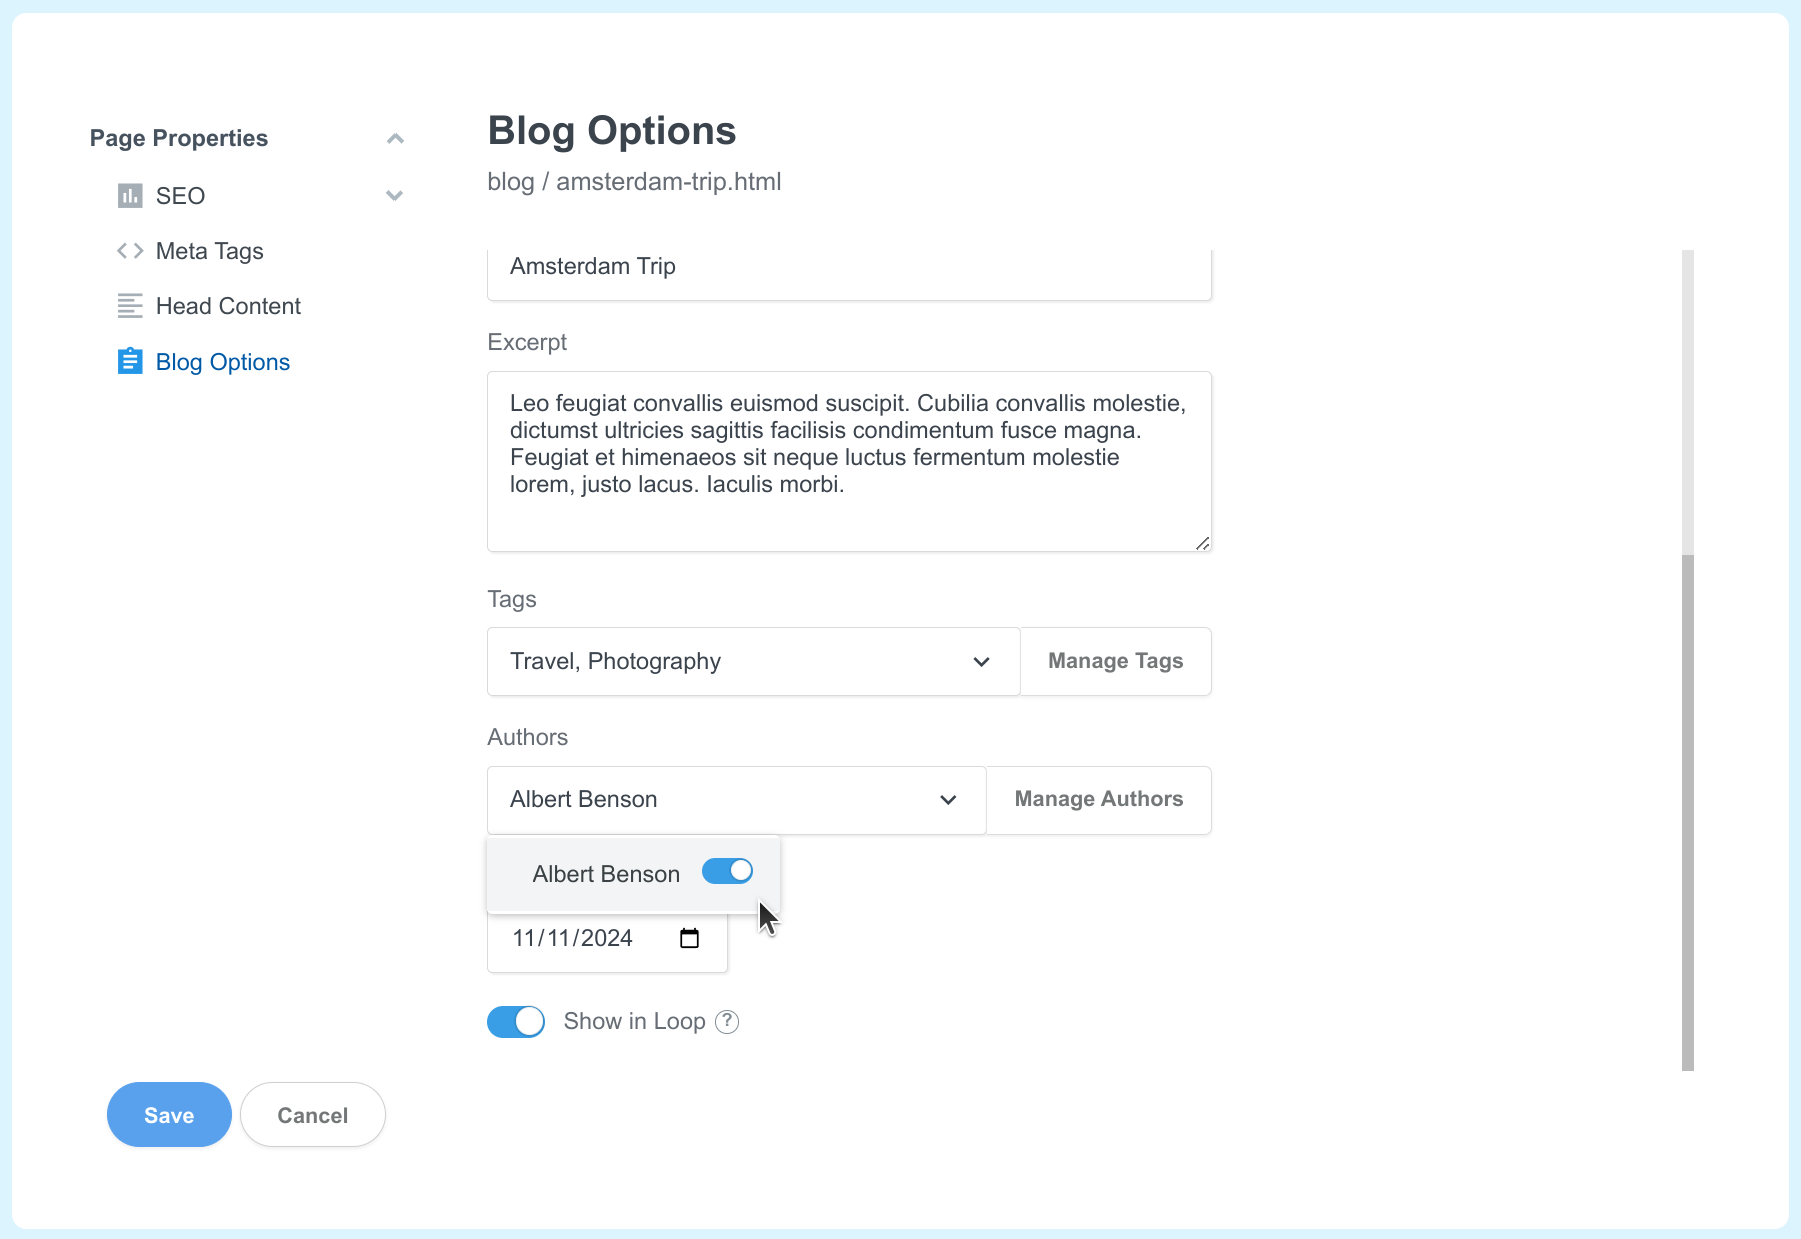
When your tag is created, you need to assign them to a post. You do this from the Page Properties dialog.
# Displaying Tags on Your Posts
The Blog Tag Nav component displays a navbar with all tags in your design.

The Blog Post Tags component is placed inside a blog post and displays only its assigned tags.
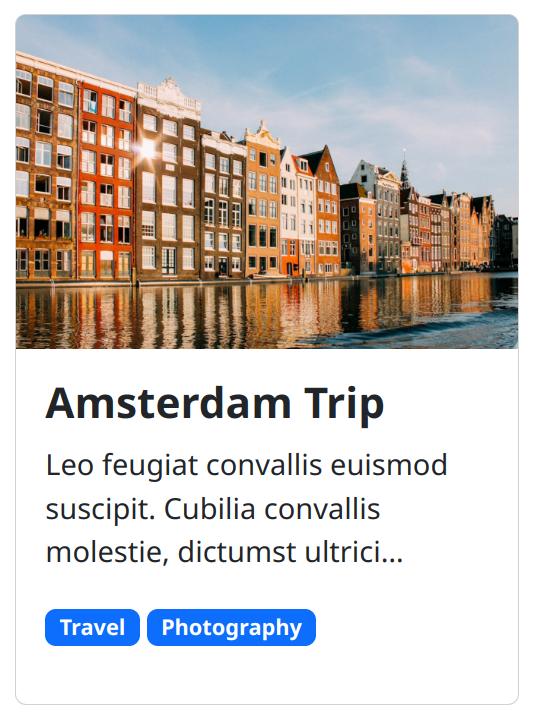
You can freely customize both of these so they fit better with your design.
# Building a Tag Page
A tag page is a combination of two components:
- Blog Tag Nav displays a navbar with all tags in your design.
- Blog Loop displays a list of blog posts.
When the user clicks a tag in the bar, it filters the Blog Loop so that it shows only the posts belonging to that tag.
To connect these two components, you need to do the following:
- Create a page in your design. It can be any name, but we will go with
tags.htmlfor this example. - Drop a
Blog Tag Navcomponent in a your page and leave its default options. TheActive Tag From URLsetting should be active. Also theTag Page URLsetting should be blank, which will result in the current page URL being used. - Drop a
Blog Loopcomponent and select your blog folder. Then set theFilter by Tagsetting toFrom URL. This will make the blog loop look for?tag=<slug>query parameters in the URL.
The result is that visitors of your site will be able to click a tag and filter the posts in the Blog Loop.
If you have a Blog Post Tags component in your blog post pages, you can enter /tags.html as its Tag Page URL. This way clicking a tag anywhere on your site will lead users to /tags.html?tag=<slug> and filter by posts in that tag.
You can see a working example in the attached bsdesign file near the top of this article.
# Blog Authors
Using authors in your blog posts involves the following steps:
- Create the authors in the
Settings > Blogdialog. They are saved on the design level, meaning that authors are available to all pages/blog posts in your design. - Assign the authors to a blog post from
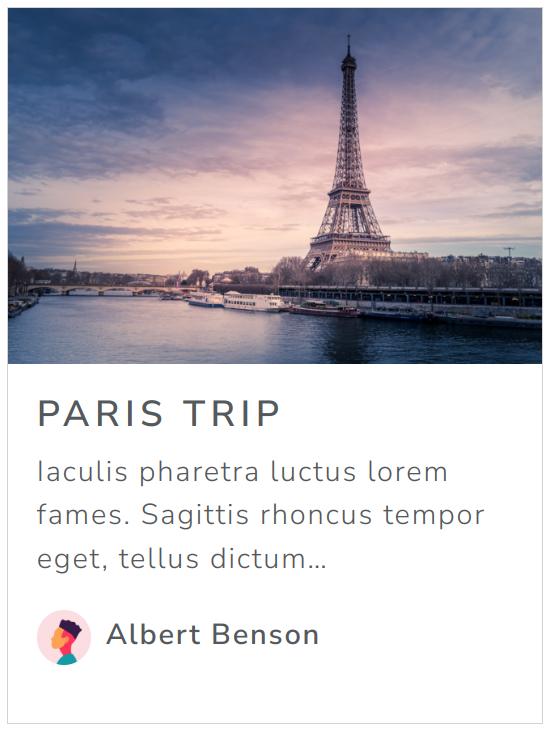
Page Properties > Blog Options. - Display authors underneath blog posts with the Blog Post Authors component. It can be placed in blog pages as well as in the Blog Loop.
- Build an author page (optional). If you wish to have a single page that displays all posts by a single author, alongside their profile photo and bio.
You can learn more about each of these steps below.
# Creating Authors
Creating authors is done from the Settings > Blog dialog, and then selecting the Authors pane.
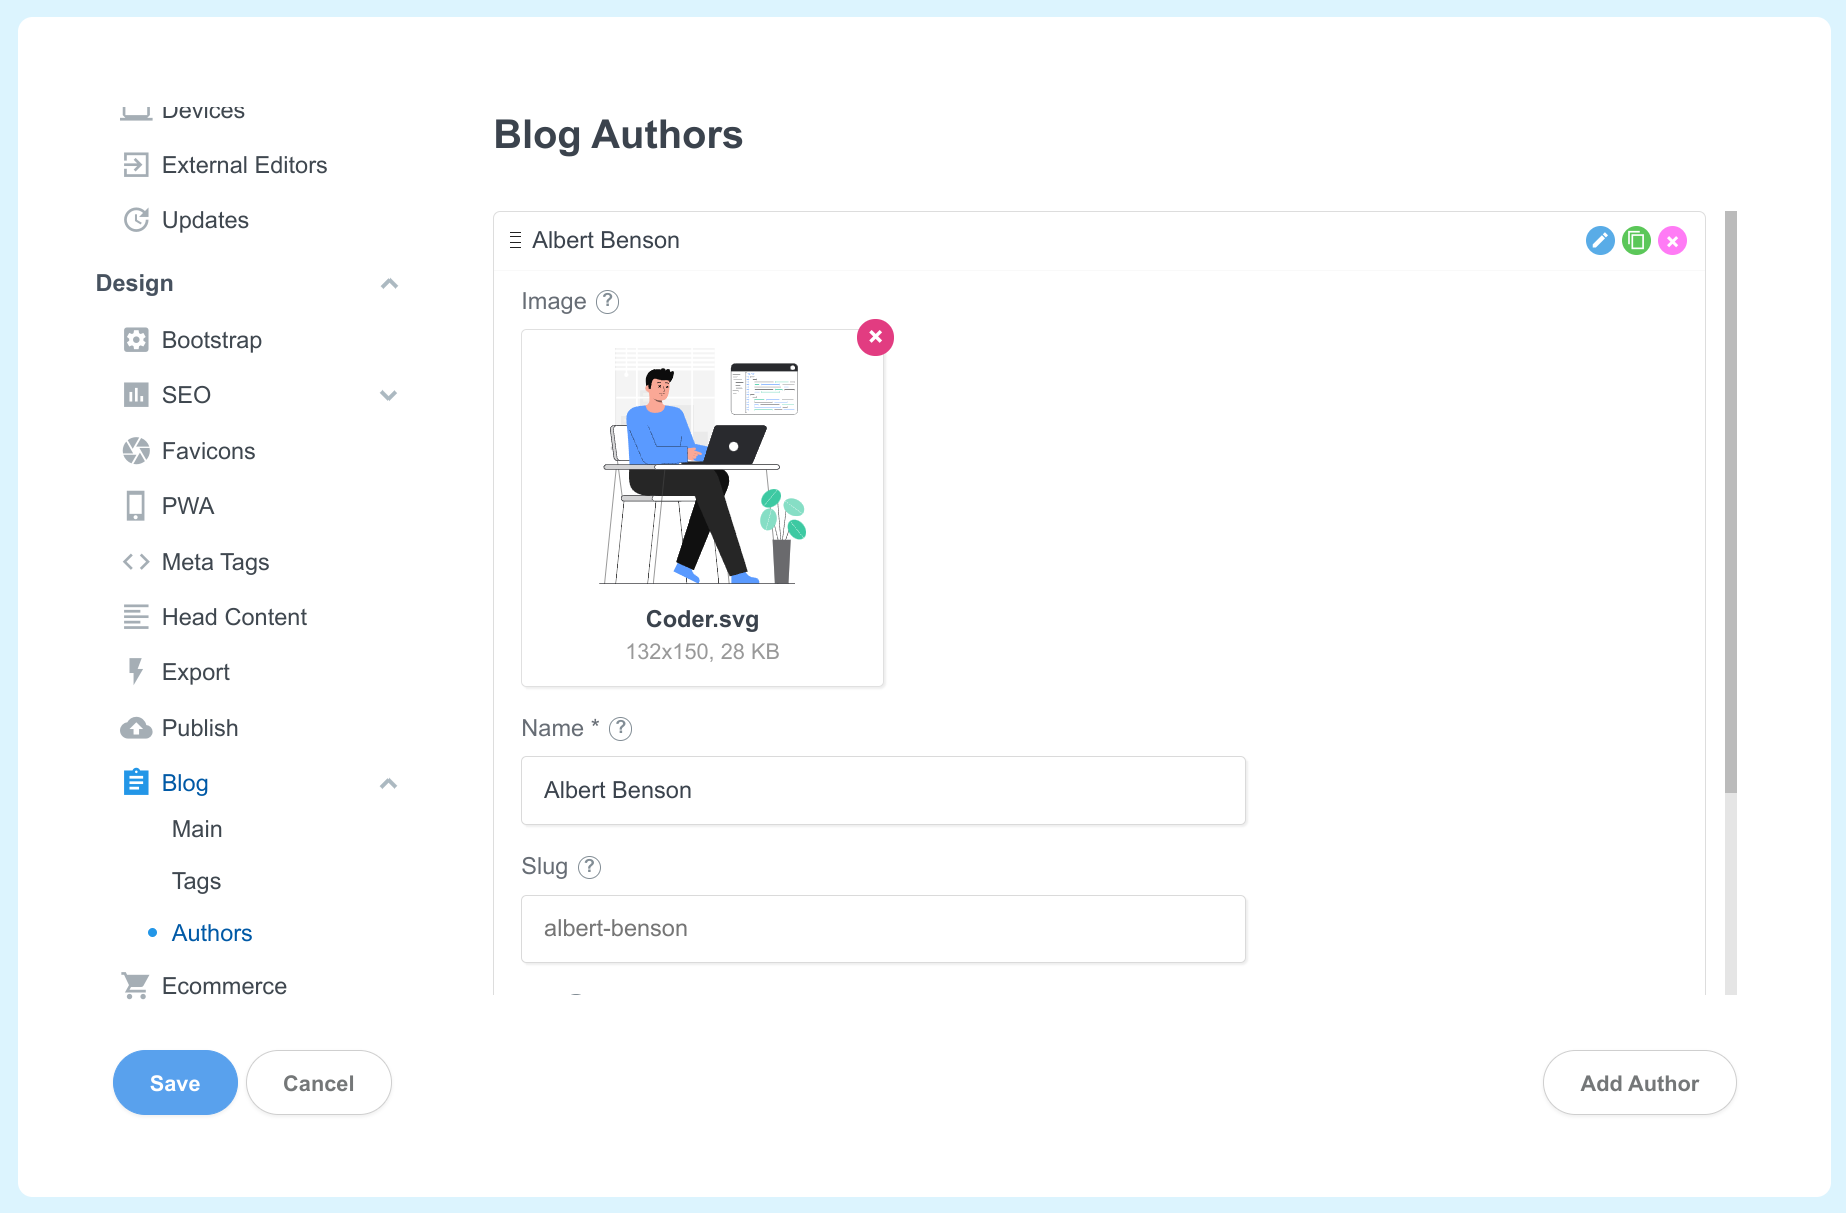
Here you will need to enter the author's image, name, slug and bio. The slug is a special identifier that is used when you set your authors to be links (more on this later). Each author will add a ?author=<slug> parameter to the URL when clicked. This enables your author page to display posts only by the specific author.
You can rearrange the position of the authors by dragging the handle. This will affect the order in which the authors are displayed in the Blog Post Authors component.
# Assigning Authors to Posts
When your author is created, you need to assign them to a post. You do this from the Page Properties dialog.
# Displaying Authors on Your Posts
The Blog Post Authors component is placed inside a blog post and displays only its assigned authors. You can place one of the other Blog Author XX components inside it to customize how the authors are displayed.
You can freely customize it so it fits better with your design.
# Building an Author Page
An author page is a combination of two components:
- Blog Authors displays the author's image, name and bio.
- Blog Loop displays a list of blog posts by the specified author.
To connect these components, you need to do the following:
- Create a page in your design. It can be any name, but we will go with
authors.htmlfor this example. - Drop a
Blog Authorscomponent in a your page and activate theAuthor from URLsetting. This will make the component look for?author=<slug>query parameters in the URL when deciding which author to display. - Drop a
Blog Loopcomponent and select your blog folder. Then set theFilter by Authoroption toFrom URL. This will make Blog Loop look for?author=<slug>query parameters in the URL.
Finally, if you have a Blog Post Authors component in your blog post pages, you can enter /authors.html as its Author Page URL. This way clicking an author anywhere on your site will lead users to /authors.html?author=<slug> which will show the author's info and posts.
You can see a working example in the attached bsdesign file near the top of this article.
With this our blog with dynamic author and tag pages is complete!