# Images
The Image component represents an image, illustration or photo in your design. It can point either to images that you've imported in your design, or to externally hosted ones.
# Basics
Drag and drop an Image component from the Component panel to the stage. It will appear blank, because it won't be pointing to any image file. Double clicking the image will open the Image browser, where you can browse all imported images in your design.
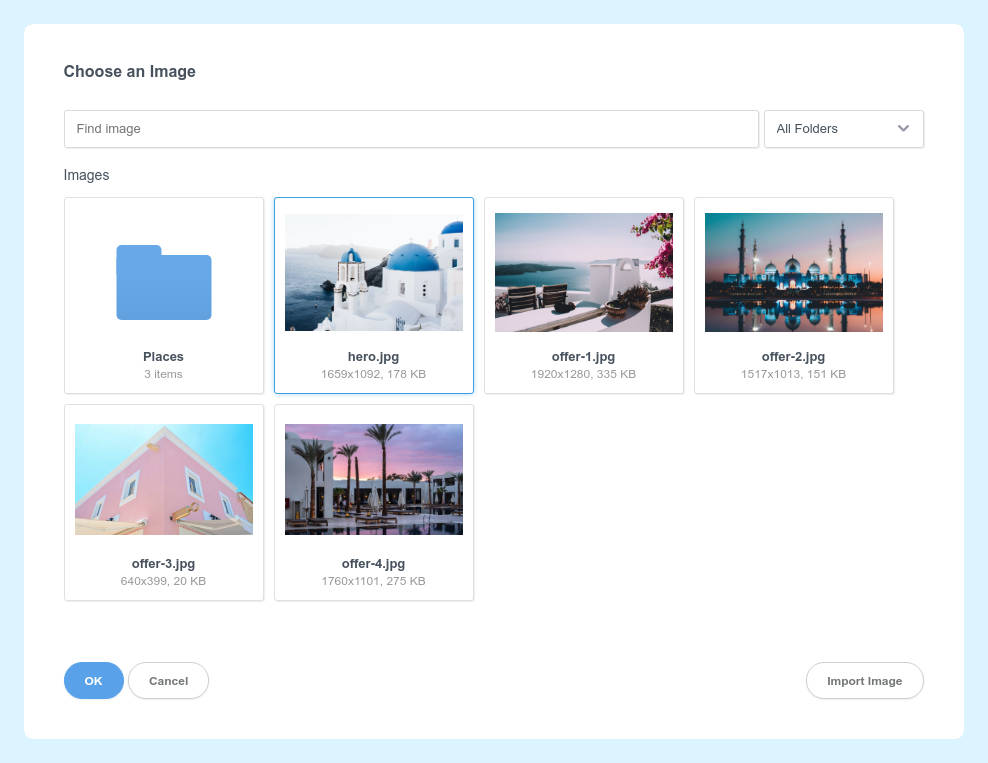
Pick one of the images by double clicking it (or by single clicking and choosing Save). This will display it on the page.
# Image Options
When an Image component is selected, the Options panel will reveal a number of useful controls for customizing your image.
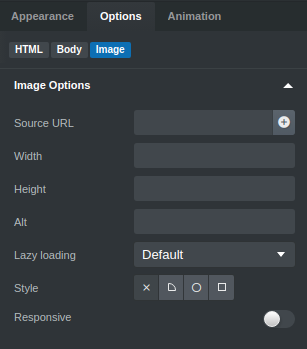
Here is a quick description of the settings:
- Source URL - Contains the URL of the image the component is displaying. You may use it to point to remote images.
- Width & Height - Sets the respective attributes on the image, defining it's size. It's preferable to use CSS instead of these two options.
- Alt - This is a description of what your image contains. It's displayed when images can't be loaded and are read by screen readers.
- Lazy Loading - This option controls the loading attribute (opens new window), which can make the browser load images only when they are visible.
- Style - Lets you quickly define the basic shape of the image.
- Responsive - This option ensures that the image scales with its parent and never exceeds its width. This way, your layouts look great on all screen sizes.
# Turning Images Into Links
To turn an image into a link, so that clicking it leads the user to another page/site, you need to drop the image inside a Link component. Steps:
- Find the
Linkcomponent in the Component panel and drop it into the page. - Delete the text of the link, so that it's empty.
- Drop an image inside the link. You will need to do this from the Overview panel, because when the link empty it has no height and you won't be able to drop the image inside it from the Stage.
Now you can control which URL the image leads to when clicked, by selecting the Link component and changing its URL setting in the Options panel.
# Remote Images
Instead of importing an image file, you can point the Image component to a URL. Just paste your URL in the Source URL field. This way you don't need to import the image in Bootstrap Studio, and your server is in control of what image to return to the client.
Note
Don't link to images hosted on other people's websites. This is known as hotlinking and is considered a bad practice. The owner of the website may remove or change the image at any time, breaking your web pages.
# Using Free Stock Photos
The app comes with built-in integration for Unsplash, Pexels and Pixabay. These services offer free stock photos with permissive licensing which you can use directly in your project. You can search and download images from the image picker.
Note, as stock photos can be large, you may want to optimize them after importing.
# Generating Images with AI
The app comes with a built-in integration for OpenAI's DALL-E image generator. To access it, open the image picker, choose your desired image dimensions, enter a description, and click "Generate".
See it in action below.
Note
The generated images will be deleted when the app is closed, so make sure to either import them into your design or export them to your computer by clicking the "Export" button in the bottom right corner of the image preview.
# Tips
- To make sure images are responsive and look good on all devices, don't give them a width/height. Instead, make sure that the "Responsive" switch in the image options is enabled. This will make the image take the entire width of its parent. Place the image in a Column to limit its size.
- Be sure to set the Alt option of your images. It improves accessibility and can be good for SEO.
- When using webp and avif, make sure to include a fallback for older browsers. The picture component lets you add fallback
jpg,png,gifandsvg. - Image file size is important. Web pages with smaller images load faster and save people's data plan when viewed on mobile. Try to keep images below 200kb when possible.